To install Unity and Visual Studio, follow these steps:
1. Install Unity:
- Download Unity Hub:
- Go to the Unity download page and download Unity Hub.
- Install Unity Hub on your computer.
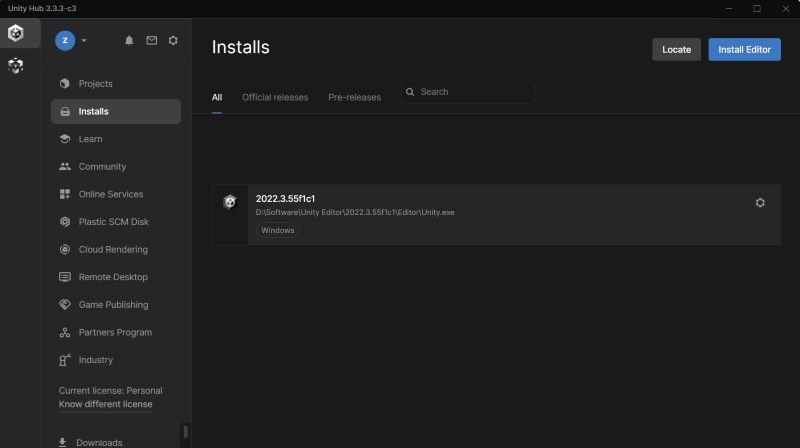
- Install Unity via Unity Hub:
- Open Unity Hub and sign in with a Unity account (you can create one if you don’t have one).
- In Unity Hub, go to the “Installs” tab and click “Add”.
- Choose the version of Unity you want to install (usually the latest version is recommended).
- You can also select additional modules like Android Build Support, WebGL, or iOS if needed.
- Click “Next” and let Unity install.
2. Install Visual Studio:
- Download Visual Studio:
- Go to the Visual Studio download page and download the free Visual Studio Community edition (or any other edition you prefer).
- Install Visual Studio:
- Run the installer you downloaded.
- During installation, select the “Game Development with Unity” workload to install the necessary tools for Unity development.
- Complete the installation by following the on-screen instructions.
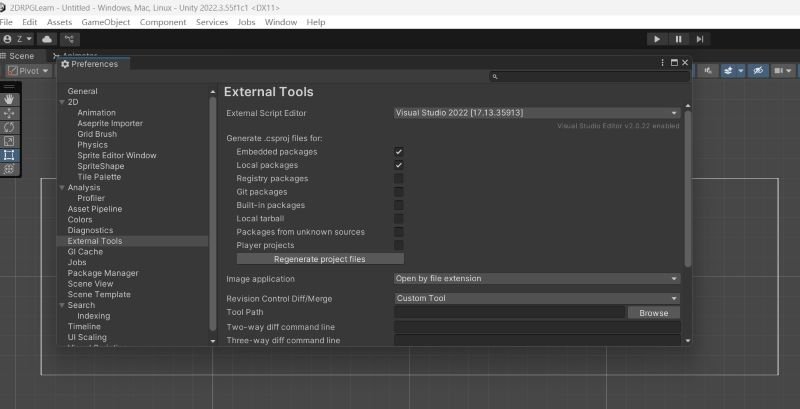
3. Configure Unity to use Visual Studio:
- After installing Visual Studio, Unity should automatically detect it as the default IDE.
- To confirm, open Unity and go to Edit > Preferences > External Tools. Ensure External Script Editor is set to Visual Studio.
You’re all set! Now you can start developing Unity projects with Visual Studio as your IDE. Let me know if you run into any issues!
References: Install & configure Visual Studio Tools for Unity | Microsoft Learn
Please follow and like us:
Related posts:
 Unity Game Development – Systematic Learning Roadmap (2025 Edition)
Unity in Practice 0009 – How to Use Sprite Sheets in Unity for 2D Animation and UI
Unity in Practice 0005 – Create C# Script
Unity in Practice 0003 – Unity Editor Windows and Tools
Unity Game Development – Systematic Learning Roadmap (2025 Edition)
Unity in Practice 0009 – How to Use Sprite Sheets in Unity for 2D Animation and UI
Unity in Practice 0005 – Create C# Script
Unity in Practice 0003 – Unity Editor Windows and Tools
 How to Check SSL/TLS Versions and Cipher Suites on macOS and Windows
 How to Build a Website from Scratch (Step-by-Step Guide for Beginners)
Unity in Practice 0004 – Unity Rigidbody
Unity in Practice 0007 – Very First Unity C# Code to Move and Jump a 2D Ball
How to Build a Website from Scratch (Step-by-Step Guide for Beginners)
Unity in Practice 0004 – Unity Rigidbody
Unity in Practice 0007 – Very First Unity C# Code to Move and Jump a 2D Ball