Unity Rigidbody Introduction
In Unity, a Rigidbody is a component that enables an object to interact with the physics engine. It allows GameObjects to respond to gravity, forces, collisions, and other physical effects, making movement and interaction more realistic.
🔧 Key Features of Rigidbody:
| Feature | Description |
|---|---|
| Mass | Controls how heavy the object is. Heavier objects need more force to move. |
| Drag | Slows down movement over time (like air resistance). |
| Angular Drag | Slows down rotational movement. |
| Use Gravity | Determines whether the object is affected by gravity. |
| Is Kinematic | If checked, the object is not affected by physics forces, but can still be moved via script. |
| Interpolate | Smooths out movement when the object is moving fast or the frame rate is low. |
| Collision Detection | Controls how collisions are detected (Discrete, Continuous, etc.). |
Sample In Practice
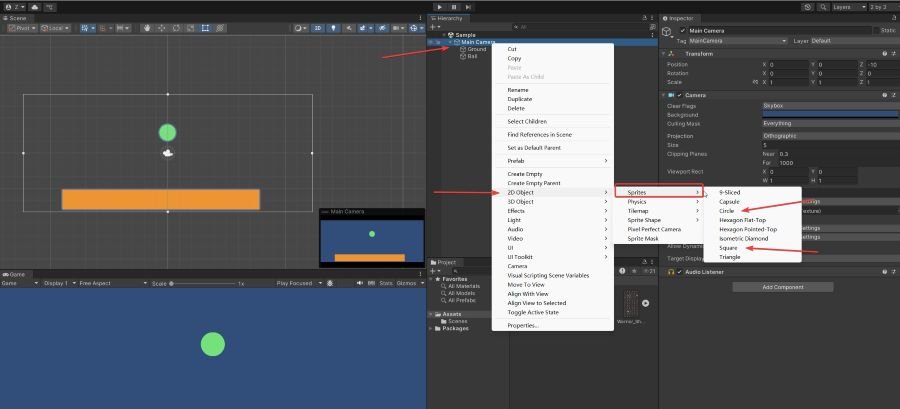
Step 1: Create Two 2D Sprites
- Ground: Right-click on “Main Camera” → 2D Object → Sprites → Square, then select it and change its color to yellow in the Inspector.
- Ball: Right-click on “Main Camera” → 2D Object → Sprites → Circle, then change its color to green in the Inspector.
Click the Play button. You’ll notice that the ball remains static—it doesn’t move yet.
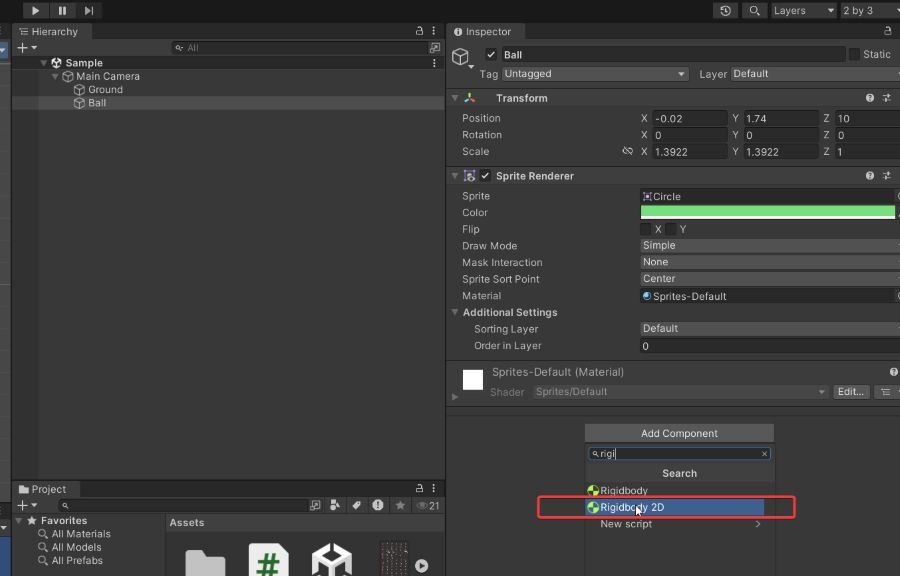
Step 2: Add Rigidbody2D to the Ball
Select the Ball object in the Hierarchy, then click Add Component in the Inspector. Search for and add the Rigidbody2D component.
Now, when you press the Play button, the ball will fall due to gravity. but it will not stop when the ball htis to the ground.
Step 3: Add Colliders for Collision Detection
- Ground: Select the Ground object, click Add Component, and add a BoxCollider2D.
- Ball: Select the Ball object, click Add Component, and add a CircleCollider2D.
Now press Play—the ball should fall and stop when it hits the ground, thanks to the colliders and Rigidbody2D working together.
❓ Why Doesn’t the Ball Bounce When It Hits the Ground?
By default, Unity’s Rigidbody2D and Collider2D components do not produce bounce effects. Bouncing (or rebound) depends on the object’s Physics Material 2D settings.
✅ To Make the Ball Bounce, Follow These Steps:
Step 1: Create a Physics Material 2D
- In the Project panel, right-click →
Create → 2D → Physics Material 2D - Name it
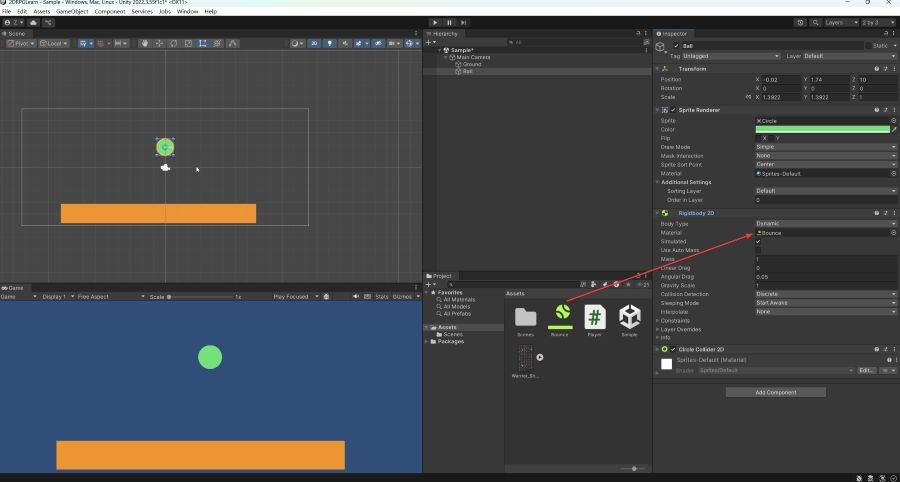
BouncyMaterial - In the Inspector, set the properties:
- Friction:
0 - Bounciness:
1(you can also try values between 0.8 and 1.0)
- Friction:
Step 2: Apply the Material to the Ball’s Collider
- Select the Ball object
- Locate the CircleCollider2D component
- Drag the
BouncyMaterialto its Material field
🔁 Run the Game
Now, when you press Play, the ball should bounce when it hits the ground.
Related posts:
 Unity in Practice 0013 – Physical Material 2D Introduction
Unity in Practice 0007 – Very First Unity C# Code to Move and Jump a 2D Ball
Unity in Practice 0011 – Player Jump with Ground Check in Unity
Unity in Practice 0009 – How to Use Sprite Sheets in Unity for 2D Animation and UI
Unity Game Development – Systematic Learning Roadmap (2025 Edition)
Unity in Practice 0012 – Blend Tree in Unity
Unity in Practice 0014 – Unity 2D Dash and Dash Cooldown with Time.deltaTime
Unity in Practice 0008 – Encapsulation and Inspector Access with Unity’s [SerializeField]
Unity in Practice 0013 – Physical Material 2D Introduction
Unity in Practice 0007 – Very First Unity C# Code to Move and Jump a 2D Ball
Unity in Practice 0011 – Player Jump with Ground Check in Unity
Unity in Practice 0009 – How to Use Sprite Sheets in Unity for 2D Animation and UI
Unity Game Development – Systematic Learning Roadmap (2025 Edition)
Unity in Practice 0012 – Blend Tree in Unity
Unity in Practice 0014 – Unity 2D Dash and Dash Cooldown with Time.deltaTime
Unity in Practice 0008 – Encapsulation and Inspector Access with Unity’s [SerializeField]