In Part 2 of this beginner series, we covered a most important step: How to choose right Website Platform or Builder – Start a Website Guide Part 2. Once you have decide your platform, the next critical step is Register a Domain and Set Up Hosting for your website.
Choosing the right domain name and hosting provider is one of the most crucial steps when building your website. In this Part 3 of the Building Website Tutorials series, we’ll walk through how to register a domain name, set up web hosting, and connect them—so your site is live and accessible to the world.
🔍 Step 1: Choose and Register a Domain Name
A domain name is your website’s address—what people type in to visit your site (e.g., yourdomain.com). Choose something that reflects your brand, is easy to remember, and ideally includes keywords relevant to your content.
✅ Tips for Choosing a Great Domain Name:
- Keep it short, simple, and easy to spell
- Avoid numbers and hyphens
- Use relevant keywords (e.g., “code”, “tech”, “design”)
- Choose a suitable extension like
.com,.net, or.io
🛒 How to Register:
Use a domain registrar like:
Search for your preferred domain name, check its availability, and complete the purchase. Domains typically cost between $10–20/year.
🌐 Step 2: Set Up Web Hosting
Web hosting is where your website’s files live. Think of it as the physical “home” for your website on the internet.
💡 Popular Hosting Providers:
- Bluehost – Great for WordPress beginners
- SiteGround – Fast and reliable support
- Hostinger – Affordable starter plans
- Cloudways – Cloud hosting for tech-savvy users
📦 Hosting Types:
- Shared Hosting: Cheapest, good for beginners
- VPS Hosting: More power, moderate technical knowledge required
- Cloud Hosting: Scalable and fast, good for growth
- Managed WordPress Hosting: Optimized for WordPress, includes automatic updates and backups
Once you choose a hosting plan, create an account and purchase the hosting package.
🔗 Step 3: Connect Domain to Hosting
After registering your domain and purchasing hosting, you need to connect the two:
🔧 Option 1: Change Nameservers
Your hosting provider will give you two nameservers (e.g., ns1.hostingcompany.com, ns2.hostingcompany.com). Log in to your domain registrar, find the DNS settings, and replace the default nameservers with the ones from your hosting provider.
⏱ Wait for Propagation:
DNS updates can take up to 24 hours to fully propagate globally, but most changes happen within 1–2 hours.
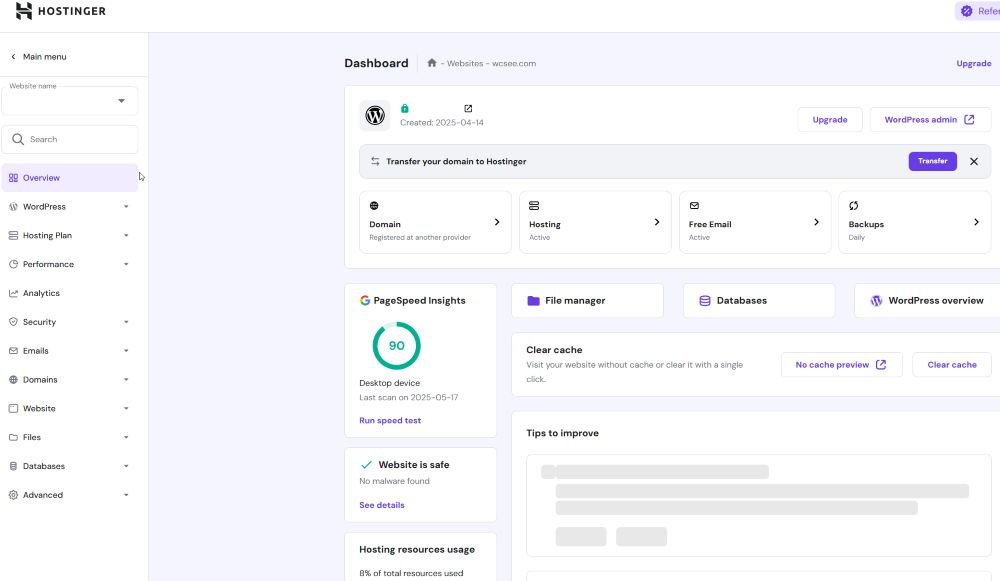
🚀 Step 4: Install a CMS (Optional but Recommended)
If you’re planning to use WordPress or another content management system (CMS), your hosting provider usually offers 1-click installation. Just go to your hosting dashboard and look for a WordPress or CMS installer tool.
🧩 Summary
| Task | Description |
|---|---|
| Register a Domain | Pick a unique name and secure it via a registrar |
| Set Up Hosting | Choose a hosting provider and purchase a plan |
| Connect Domain & Hosting | Update DNS or use nameservers provided by your host |
| Install CMS | Use one-click installs for WordPress or other platforms |
💡 Tips: Can use Hostinger’s “managed hosting platform for WordPress” which offer a free domain, managed hosting, installed WordPress, and more
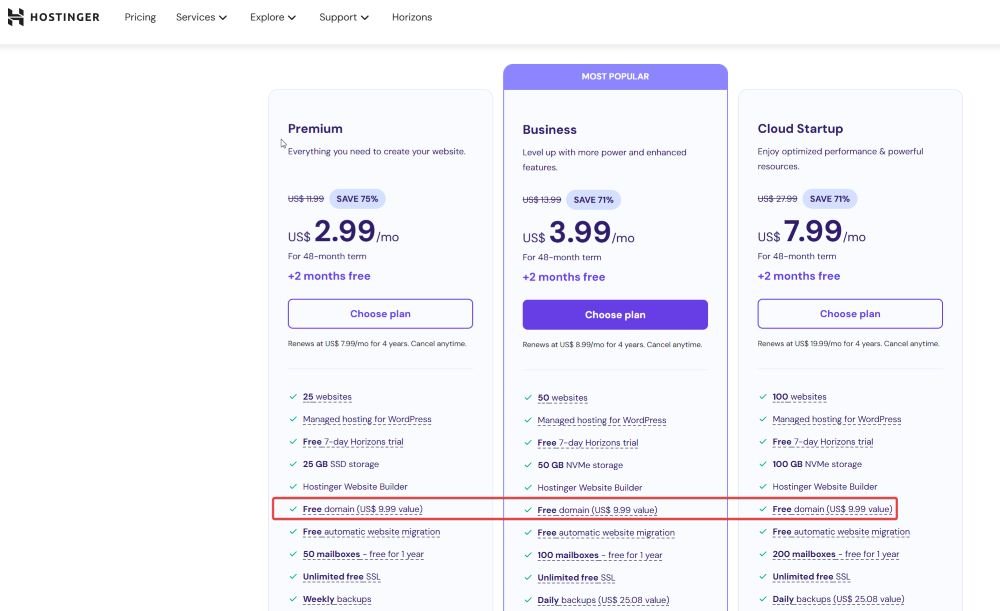
If you’re interested in Hostinger, feel free to use my referral link to get an additional discount: Hostinger with extra 20% Discount
Check following series to build a website from scratch.

- Build a Website from Scratch – Step by Step Guide for Beginners
- Define Your Website Purpose – Start a Website Guide – Part 1
- Right Website Platform or Builder – Start a Website Guide Part 2
- Register a Domain and Set Up Hosting | Website Guide Part 3
- Set Up and Customize Website | Website Building Tutorials Part 4
Related posts:
 How to Build a Website from Scratch (Step-by-Step Guide for Beginners)
Choose the Right Website Platform or Builder | Building Website Tutorials Part 2
Define Your Website Purpose Clearly | Building Website Tutorials Part 1
Set Up and Customize Website Using WordPress | Building Website Tutorials Part 4
How to Build a Website from Scratch (Step-by-Step Guide for Beginners)
Choose the Right Website Platform or Builder | Building Website Tutorials Part 2
Define Your Website Purpose Clearly | Building Website Tutorials Part 1
Set Up and Customize Website Using WordPress | Building Website Tutorials Part 4
 How to Check SSL/TLS Versions and Cipher Suites on macOS and Windows
 IT Audit Guide 05: IT Audit Process (Step-by-Step Guide)